
In Northern BC, the lot and the weather make more decisions about a custom home than the floor plan does. On a wet coast site from Prince Rupert to Port Edward, and from Terrace to Kitimat, drainage, slope, soil, snow and rain loading, and the practical reality of drying in a structure are not details to sort out after drawings are complete. They are the pre-design questions that protect the build.
This tutorial walks through the conversation a Northern BC builder should have with an owner before design is finalized. You will see why the lot and weather outrank the floor plan, how drainage becomes the first question on a wet coast lot, why slope, soil, and a geotechnical look pay for themselves, and how to settle snow, rain, and wind loading before design. We will cover local climate data, elevation and exposure, cold air pools, drying in on a wet-weather site, and what deferring these decisions actually costs. You will also get a checklist of what to ask custom home builders before drawings are finalized, so the site is settled first and the house design follows.
Why the Lot and the Weather Outrank the Floor Plan
On a North Coast lot, drainage, slope, soil, snow and rain loads, and the dry-in sequence set the limits the floor plan gets fitted inside. Drawings that ignore them get revised later, after money is committed.
Design values are location-specific. Under the BC Building Code, design values for snow, wind, and seismic loads are determined for the actual site, not borrowed from a neighbouring community’s figures. Appendix C carries design weather data for over 100 BC locations, interpolated with adjustments for elevation and topography. It is the reference point, not a substitute for checking the lot.
Those Appendix C values are recommended design data. Local government building authorities may set different legal requirements, so confirm the local authority’s numbers for the address before drawings are finalized. The code notes evidence is mounting that Canadian climates are changing, while design analysis assumes past climate represents the future. Raise that honestly with an owner rather than treating a design value as permanent.
J & J Construction has built in Prince Rupert, Port Edward, Terrace, and Kitimat for nearly 50 years. That history is pattern recognition: which lots hold water, which slopes move, and which exposures punish a weak detail. The same pattern recognition shapes envelope scopes such as siding replacement in coastal BC, where cladding alone is not the full requirement.
Drainage: The First Question on a Wet Coast Lot
Drainage is the first technical decision on a wet coast lot. Coastal rain and hillside runoff from above put surface and subsurface water at the top of the pre-design list. Settle where water enters and leaves the site before footing elevations are set.
Map uphill neighbours, roadside ditches, culverts, natural swales, and seasonal seepage. If a lot ponds in November, assume it will pond in the finished yard unless the plan changes that flow.
Foundation and envelope details belong in the same decision: footing drains, damp-proofing, a drainage layer, and final grade falling away from the wall. Footing drains are easier to install before backfill; retrofitting after the fact means costly, disruptive work below the wall you just built. Clay-heavy or disturbed ground drains slowly, and fill placed without proper compaction can hold water against a foundation long after construction is complete.
Roof runoff belongs in that plan: Do Not Separate the Roof From the Drainage Plan. Bring your builder wet-season photos, previous site work records, and any neighbouring development that changed local drainage. That evidence frames the next question: slope and soil.
Slope, Soil, and Why a Geotechnical Look Pays for Itself
Once drainage is mapped, the next question is what the ground under the lot will do. Sloped North Coast lots need site-specific checking: published climate values apply to populated valleys, and conditions on slopes or high passes are very different. Soil type drives foundation choice, footing depth, and how much excavation is realistic on a constrained lot. Fill, organics, glacial till, and marine deposits each behave differently under load and water.
A geotechnical investigation is a standard design topic for projects required to conform with the code, answering bearing capacity, groundwater, and slope stability questions before structural design begins. Changing the grade changes the loads: benching, filling, or retaining alters drainage and load paths, so those decisions have to be made while the structural design can still respond.
On lots with visible grade change, confirm setbacks, retaining requirements, and equipment access early. Excavators, concrete trucks, and crane placements all depend on a driveway that actually exists. The sequencing that follows is set out in our guide to what to expect at each stage of a custom build.
Snow, Rain, and Wind Loading: Settle the Numbers Before Design
With soil and slope settled, the next pre-design number is load. Those site-specific values, confirmed in the pre-design stage, not assumed from a neighbouring town, drive roof framing, trusses, and connection details, so they belong at the start of design, not in a late structural review.
Appendix C’s design weather table, covering over 100 BC locations and adjusted for elevation and topography, is the starting reference, but a higher or more exposed lot can carry different numbers. Precipitation rises with elevation; winds run stronger near large water bodies. On a coastal lot in Prince Rupert or Port Edward, exposure is part of the design value, not a rounding error.
Members are designed under Part 9 where the build falls within its scope, or under Part 4 with a stamped engineer’s design where it does not. Part 9 floors assume 2.4 kPa live load, studs and joists at 600 mm on centre, and clear spans up to 12.2 m. Those limits mark the edge of Part 9.
Roof geometry changes how snow and rain behave. Valleys, low-slope sections, and deep overhangs should be decided with load values in hand, not chosen first and justified afterwards. When the roof package is tendered, our roofing contractor checklist covers what to verify.
Climate Data Is Local: Elevation, Exposure, and Cold Air Pools
Those load numbers depend on which data you use. Interpolated design values carry adjustments for elevation and topography, so two lots a few kilometres apart can produce different design values. A community’s published number is a starting reference, not your lot’s number.
Cold air collects in depressions, a named effect in the BC Building Code’s design weather data, which means a low-lying lot can face materially different thermal conditions than a nearby ridge site. A low pocket on a Terrace or Kitimat lot behaves differently from a ridge-edge lot with constant airflow. Stronger winds near large water bodies are a named adjustment factor in the design data, and a coastal lot’s exposure must be treated as a design input, not a rounding error. Wind-driven rain is a separate problem from snow, and the same envelope has to handle both.
Mountain effects are local. An elevated or remote lot needs its own check rather than an assumption based on the nearest town. As with any address, confirm the numbers against the local authority’s enforceable requirements before drawings are finalised.
Drying In on a Wet-Weather Site
With load values confirmed, the next decision is when the structure gets closed in. In Prince Rupert, Port Edward, Terrace, and Kitimat, enclosure timing drives the schedule. Framing that sits open through weeks of coastal rain needs a staged dry-in plan, not an optimistic one.
Sequence matters. J & J’s standard sequence is roof first, then windows and doors, then wall sheathing and weather barrier, each stage protecting the one that follows. Temporary protection and water management at each stage keep water from sitting inside the assembly. On a wet-weather site those transitions get tested early, which is worth understanding before your own build: Why Building Envelope Failures Start at the Seams, Not the Surface.
J & J Construction delivers this envelope scope directly, including roofing, siding, and windows and doors. When one team handles dry-in and the finished envelope, the details decided early are the details that get built.
Material handling counts as much as detailing. Staged deliveries, covered storage, and a site that drains keep lumber, panels, and insulation out of standing water before installation.
Plan the calendar around the wet season. A crew framing in October is making a different bet than one starting in June, and the dry-in plan should say which bet is being made.
What Deferring These Decisions Actually Costs
The schedule bet you make at dry-in is only as sound as the decisions underneath it. When those pre-design decisions are deferred, the downstream result is rework, and rework cascades. The cost is not only money. A late change cascades into the permit sequence, material lead times, and trades already booked around the original dates. Trade stacking amplifies it: foundation, framing, and envelope crews run in sequence, so a redesign in one phase delays commitments made in the others. That is the same pattern behind Why Deferred Maintenance Gets Expensive on a commercial building; on a new home, it lands before the first footing is poured.
In J & J’s field experience on North Coast builds, the pre-design conversation is consistently less costly than the correction. No published rework figures are attached here because local data does not support a specific number, but the sequence risk is visible on a calendar.
Documented pre-design decisions also work later: they support the building permit application and answer questions when the house is eventually sold.
What to Ask Custom Home Builders Before Drawings Are Finalized
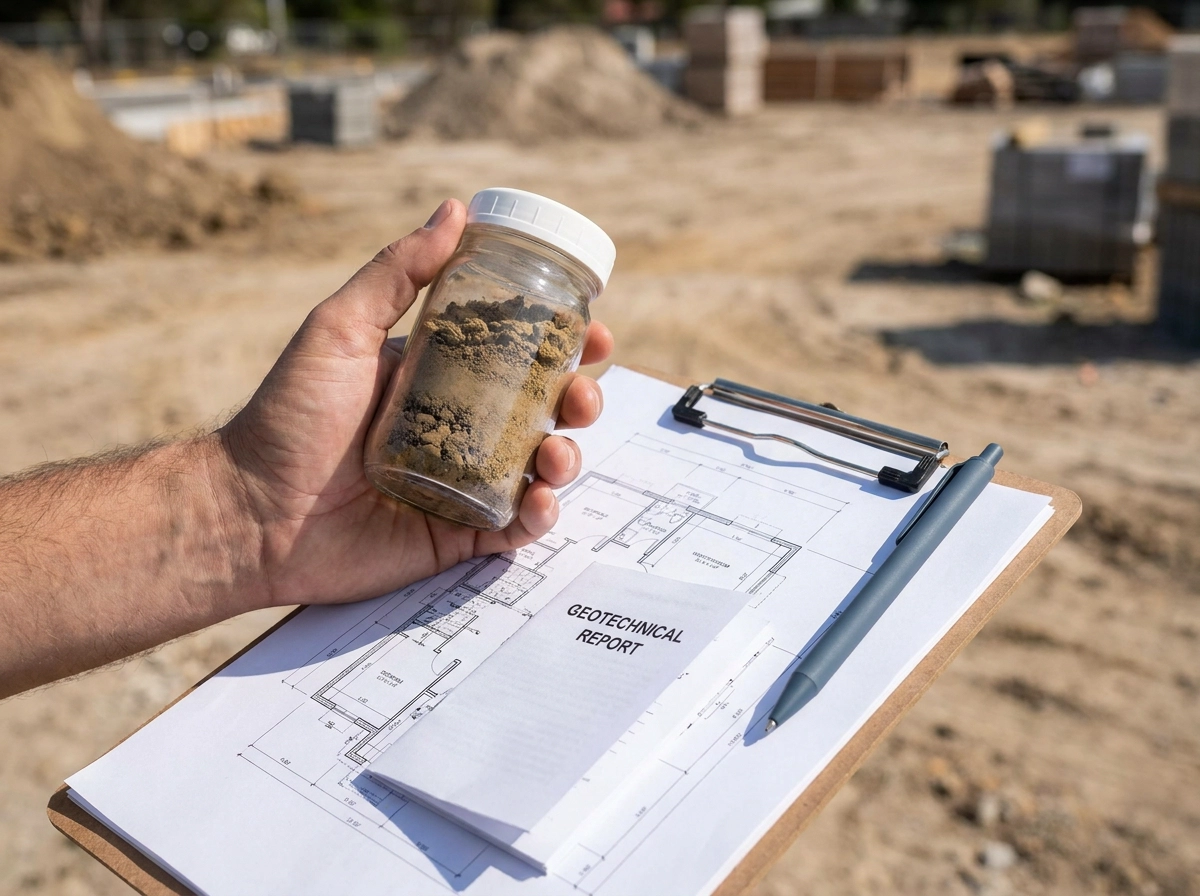
The cost of deferral shows up on a calendar, and the way to avoid it is to ask hard questions before drawings are finalized.
Ask how they confirm site-specific load values against the local authority’s legal requirements for the address.
Ask for the geotechnical investigation, drainage plan, and site plan as deliverable documents, not verbal assurances over a walk-through. Documents give a designer and an inspector the same reference point.
Ask how they handle dry-in in the wet season: the sequence, how temporary protection is provided, and who is accountable when rain arrives earlier than expected. For the broader questions that protect a build, read what to ask before construction starts.
Ask for a written scope that names the pre-design items explicitly, plus how changes are priced, approved, and communicated once construction starts.
Finally, ask what happens if the approved drawings and the site disagree. A builder with a clear change process answers that plainly. J & J Construction’s standard practice is a clear written scope and consistent communication through the build.
The Pre-Design Checklist: Settled Before Drawings
Those questions point to one deliverable: a checklist settled and signed off before drawings begin.
Site. Lot grading, where water enters and where it leaves, the drainage plan, and footing elevations agreed on paper.
Ground. Geotechnical investigation complete, foundation type confirmed, and bearing capacity and groundwater conditions understood before structural design starts.
Loads. Site-specific snow, wind, and seismic values checked against the local building authority’s requirements for the address, not the nearest town’s published figures.
Envelope. Roof form, overhangs, window and door performance, and the dry-in sequence decided together in one meeting. Split them across separate conversations and the details stop agreeing with each other.
Documentation. A written scope, site and drainage drawings, and an agreed process for communicating any change before it reaches the site. Ask for clarity before work begins, because a change raised on site is one someone still has to price and schedule.
Each item is a document, not a verbal understanding.
Conclusion: Settle the Site, Then Design the House
Once those checklist items are signed off, the lot becomes the basis for the drawings rather than a constraint on them. The lot and the weather make the structural and envelope decisions; the floor plan fits inside those limits once the pre-design checklist is signed off.
Make the pre-design work a deliverable: drainage documents, geotechnical findings, load values, and an envelope sequence a designer and an inspector can both rely on.
For a build in Prince Rupert, Port Edward, Terrace, or Kitimat, J & J Construction can walk the lot and set that scope before design begins, so the drawings are built on the ground you actually own.